![]()
![]()
![]()
![]()
|
|
|
|
|
VSys Administrators are responsible for ensuring the system database is intact in the event of an emergency, hardware failure, or just to move it to another location. Backing up the database is critical in any of these situations and it should be performed on a regular basis.
If you use GMS as well as VSys, be sure you always use VSys for your backups, as VSys backups fully back up both VSys and GMS data. GMS backups have only limited VSys information and cannot restore your complete VSys data.
Steps in this task
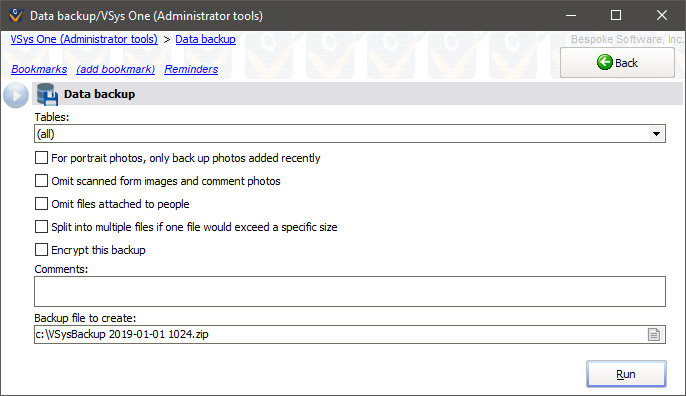
By default, all of the tables except for "trace", "voxilogs" and "zips" are selected to be backed up. With the exception of those tables, you'll generally want to back up all of your tables.
Field Names |
Definitions and Comments |
For portrait photos, only back up photos added recently |
Check to include a person's photos that you added recently. If you check this, VSys will let you enter the date range that you consider "current". Note the backup file created then may be missing important data, such as the older, existing images that weren't in the date range. |
Omit scanned form images and comment photos |
Check to leave out scanned images associated with certifications and any images attached to comments. Note the backup file created then may be missing important data. All comments and scanned certification images would be excluded. |
Split multiple files if one file would exceed a specific size |
Check to break the backup into multiple files if the backup file is very large and exceeds the size you specify in the Maximum size field. You must archive all of the files that VSys makes here in order to restore the backup later. |
Use advanced encryption |
Creates backups where the underlying tables are encrypted using AES 256 within the .zip file. Only VSys One version 3.1 and higher can restore these backups. |
Comments |
Anything you need to note about this backup. |
VSys backups made in any version of VSys without "Encrypt this backup" or "Use maximum compression" checked are all compatible with other versions of VSys. If "Encrypt this backup" is checked, a backup can only be restored by the same version of VSys: older versions don't use the same encryption method.
Magic: When VSys One makes a backup, it stores the data as embedded NexusDB tables. VSys can restore these tables to any of its compatible databases. This means you can use the backup/restore process to make a backup on one system in NexusDB, then restore it under SQL Server. Or go from SQL Server to NexusDB. VSys treats them all alike.